WINDSHIELD REFLECTIONS ( Dash & HUD)

I highly recommend that you test drive a Gravity with a HUD to see if this would really be an issue. Is there a reflection - yes, virtually any car with a HUD is going to have some type of reflection. The vast majority of drivers (like myself) just tune out this reflection and their eyes focus down road. […].

For me - do I wish there was less of a reflection - yes, does it bother me enough to go through flocking tape retrofits - no. Also, if someone wants to do this right, use Alcantara and not flocking tape.
100% agree. My Volvo XC 90 has a HUD with exactly the same type of reflections. Furthermore, it’s not just the HUD - it applies to the entire dash.

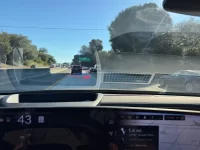
Every car I’ve driven has bad dashboard reflections depending on the angle of the sun. If the HUD reflection wasn’t there, the dash reflection seen on the right side of the photo below would replace it. Yes, the HUD may be more noticeable, but it becomes background noise. I use the HUD, and I love it for navigation. I’m hoping for AR features, but I know full well that it may never come.

For those contemplating purchasing the HUD, do a test drive with navigation (I recommend adjusting the HUD to the lowest height since there are no AR features). Note that It takes a while to get used to it. The HUD grew on me the more I used it; it was more “in your face” my Volvo).
 

Attachments

  • IMG_6610.webp
    IMG_6610.webp
    110.1 KB · Views: 278
The discussion was about putting a light blocking material only on the insides of the frame and whether or not that would eliminate the reflection entirely. Even in your picture most of your reflection is the outside/top part of the frame. Even the top of the reflection you talk about (the bottom of the frame when looking down at it) is a reflection of the outside part of the frame (that entire top left corner) that wouldn't be covered by the template that was posted earlier in the thread.
In the HUD reflection nearest the top of the windshield, the left side starts with the outside part of the frame, then transitions to the inside part of the frame. You’d need light absorbing material on both the inside and top of the frame.
 
In the HUD reflection nearest the top of the windshield, the left side starts with the outside part of the frame, then transitions to the inside part of the frame. You’d need light absorbing material on both the inside and top of the frame.
Yes, but again you were coming into a conversation about whether putting material only on the inner edges would stop all of the reflections. Which it clearly won't from both my image and yours.
 
Yes, but again you were coming into a conversation about whether putting material only on the inner edges would stop all of the reflections. Which it clearly won't from both my image and yours.
You are correct. Simply focusing on the inner edges is not sufficient. Both the inner and top edges will need to be dealt if you want to reduce the reflections from the HUD casing.

This was a useful discussion and I was wondering if I wanted to do anything about it. I’ve been hyper-focused on reflections since reading this post. I got lucky that I happened to be driving on a road at the exact time of day and sun angle to give me a worst-case reflection scenario along my entire dash.

After comparing the HUD reflection to the general dash reflections, I’m not going to change the aesthetics of the HUD/dash. Thankfully, Lucid picked a somewhat matte finish and the reflections are similar to the rest of the dash (see my image a few posts back). After snapping the picture and continuing to drive, my mind shifted to watching the road, traffic, navigation, work, appointment schedule, family, and a million other things, and the reflections “disappeared” from my mind. I actually didn’t notice when the road curved and the reflections went away. In some cars, the reflections are bad enough that I keep seeing them and am happy when they finally disappear.

I know these types of decisions are very personal and the “bothers me” threshold is different from person to person. I hope this perspective helps others in their own decision making on whether or not to purchase the HUD in the first place, or the need to take steps to reduce the reflections after purchase. There are excellent ideas by others in this post for those who want to reduce the HUD reflections.
 
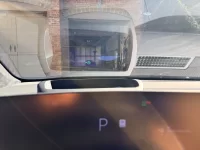
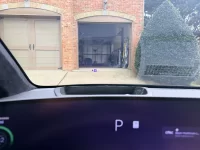
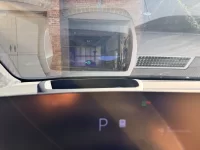
So, the flock materials from Amazon arrived. I decided to take 3 quick pics before Sunday Funday and football games. I’ll wait to cut this out when it warms up a bit in Atlanta later in the week. Both materials do a good job killing the reflections. I may take this to my PPF tech. He can probably install it a lot better than I can. Then there’s the issue of longevity. How does the adhesive hold up in the sun over time?

Pic 1: Baseline with no material. Mega reflections.
IMG_3244.webp


Pic 2: Velvet flock material, similar to what would be in a jewelry box (this has too much sheen)
IMG_3249.webp


Pic 3 : Alcantara material (I thnk this is the best. It has no sheen, although it does show brush strokes.)
IMG_3250.webp
 
So, the flock materials from Amazon arrived. I decided to take 3 quick pics before Sunday Funday and football games. I’ll wait to cut this out when it warms up a bit in Atlanta later in the week. Both materials do a good job killing the reflections. I may take this to my PPF tech. He can probably install it a lot better than I can. Then there’s the issue of longevity. How does the adhesive hold up in the sun over time?

Pic 1: Baseline with no material. Mega reflections.
View attachment 36061

Pic 2: Velvet flock material, similar to what would be in a jewelry box (this has too much sheen)
View attachment 36062

Pic 3 : Alcantara material (I thnk this is the best. It has no sheen, although it does show brush strokes.)
View attachment 36063
Did you put it on the entire dash? The vent and dash reflections appear in the baseline photo but don’t appear in the other two photos.
 
Did you put it on the entire dash? The vent and dash reflections appear in the baseline photo but don’t appear in the other two photos.
He's just testing the material's reflections and laid it over the whole dash.
 
He's just testing the material's reflections and laid it over the whole dash.
That makes sense. Looking closer, I see the material laid on the dash. Reducing the entire dash reflections and not just the HUD would be nice. This should go into Lucid’s design!
 
I’ve personally found that my polarized sun glasses cure 90% of the reflectivity issues. Yes, the illuminated information nearly disappears but a slight tilt of my head either left or right immediately brings it back into view which, for me, is great.
 
Judging from the second and third picture, an improperly cleaned windshield is as bad as the HUD reflection.
Yeah, the windshield didn’t look that dirty when I took the pic, but it definitely needs cleaning.
 
Thanks for testing for us. Let us know where it actually gets applied please. Curious if ChatGBT was right about the placement (from my earlier post). It was confident that this could be fixed with some type of material around the HUD and that it’s not a windshield or HUD hardware defect. What you’ve posted proves that. Funny the things that bother/consume us and what a simple fix it’s turning out to be.
 
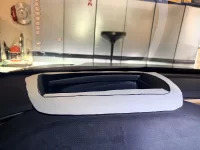
So, I took a stab laying the Alcantara material down on the HUD frame. A few thoughts:

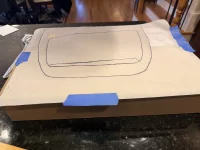
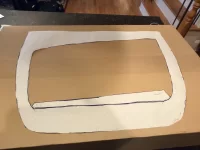
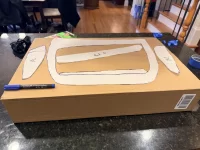
Originally, I thought I could cut this as one piece and fold it in to the inside walls to eliminate seams. That’s absolutely not going to work. There are too many trapezoidal and oblique surfaces, and the frame has absolutely no horizontal or vertical symmetry. Furthermore, it would be impossible to measure and create a drawing, unless Lucid provided a CAD drawling. I tried flipping the material over and drawing on the back. That didn’t work at all. I learned in a hurry that I was going to need to create a template, so I ordered tracing paper from Amazon to trace the frame. The below is the sausage making.


NOTE: Make sure you flip the template over when you tape it to the Alcantara backing paper to cut, or you will end up with a piece that is the mirror image opposite of what you need. The adhesive will be on the wrong side. I wasted a whole sheet making this mistake.
IMG_4657.webpIMG_4658.webpIMG_4659.webpIMG_4672.webp
 
Last edited:
Here is a partial result, inside walls only. Due to experimentation I ran out of material to finish the top of the frame. I ordered more Alcantara from Amazon. I should be able to finish the top of the frame tomorrow.

Here are some pictures of the before (baseline sunny day last week) and after (today, not very sunny day) of the inside walls. If you look closely you can see the inside walls disappear in the reflection. I’m pretty happy with the result so far. I’m encouraged that once the top of the frame is covered I can eliminate almost 100% of the reflection.IMG_2515.webpIMG_4671.webp
 
Last edited:
Here is a partial result, inside walls only. Due to experimentation I ran out of material to finish the top of the frame. I ordered more Alcantara from Amazon. I should be able to finish the top of the frame tomorrow.

Here are some pictures of the before (baseline sunny day last week) and after (today, not very sunny day) of the inside walls. If you look closely you can see the inside walls disappear in the reflection. I’m pretty happy with the result so far. I’m encouraged that once the top of the frame is covered I can eliminate almost 100% of the reflection.View attachment 36217View attachment 36219
So the solution I posted worked?
 
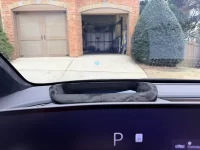
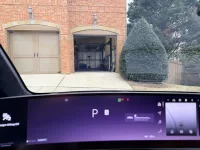
So. I finally finished putting the Alcantara material on the top of the HUD frame. From what I can see it has totally eliminated the HUD frame reflection in the windshield, although today is not a sunny day (we’re about to get snow in Atlanta).

Pic 1: Baselline (very sunny day)
IMG_2515.webp

Pic 2: Alcantara applied to top and inside walls of HUD frame. No reflections, although, overcast day. Will need to take a pic on a sunny day. For comparison you can still see the dash defrost vent reflection in the windshield on the right.
IMG_5110.webp

Pic 3: View of windshield from normal driver’s position. Note that you can’t see the Alcantara covered HUD frame from back here.
IMG_5113.webp

I will list the tools and links for materials in another post.
 
So. I finally finished putting the Alcantara material on the top of the HUD frame. From what I can see it has totally eliminated the HUD frame reflection in the windshield, although today is not a sunny day (we’re about to get snow in Atlanta).

Pic 1: Baselline (very sunny day)
View attachment 36272

Pic 2: Alcantara applied to top and inside walls of HUD frame. No reflections, although, overcast day. Will need to take a pic on a sunny day. For comparison you can still see the dash defrost vent reflection in the windshield on the right.
View attachment 36273

Pic 3: View of windshield from normal driver’s position. Note that you can’t see the Alcantara covered HUD frame from back here.
View attachment 36274

I will list the tools and links for materials in another post.
The issue just isn't with the frame though it's the blue ovals that are generated under certain light conditions. It seems the HUD housing as a whole needs to be re-addressed by Lucid. The frame reflections doesn't bother me, that's always been a thing in any car I've owned with a HUD. The blue ovals though? Never seen that before except on the Gravity.
 
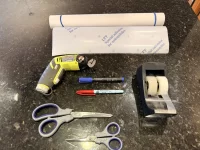
Here’s the tools and materials you’ll need to cover the HUD frame with Alcantara.

1. Roll of black Alcantara from Amazon for $16.
2. Roll of tracing paper from Amazon for $8.
3. Felt tip pen or similar to trace the frame on the tracing paper.
5. Permanent marker to trace the template on the Alcantara backing paper.
6. Scissors to cut the tracing paper.
7. Electric scissors if you have them to cut the Alcantara around the template. This is optional, but made quick work of things.
8. Scotch Magic tape to hold the tracing paper to the dash and backing paper.

Alcantara roll:

Tracing paper:

Don’t forget to flip you template over when you tape it to the backing paper.

Ideally, someone with a handheld scanner would scan that frame, create a 3D image, and then a drawing of the various surfaces to create more accurate templates.
 

Attachments

  • IMG_5115.webp
    IMG_5115.webp
    2.3 MB · Views: 169
Back
Top